
Fishnet Nail Designs to Make a Statement
Fishnet nail designs are the perfect way to make a statement. They add intrigue and sexiness to any outfit, and they’re surprisingly easy to create. Whether you’re going for a casual or formal look, fishnet nails will give your style an edge. Here are simple designs that will help you get started. Enjoy!
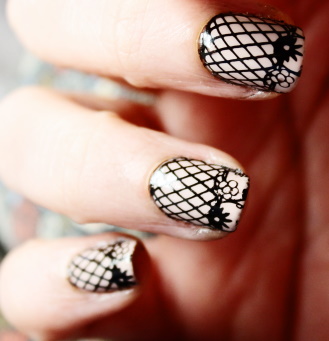
DIY glamorous fishnet nails at home
A fishnet nail design is a bold and unique way to make a statement with your nails. This edgy style can be created with either real fishnet material or a stencil. Either way, you are sure to turn heads with this funky nail art!
 If you want to try out a fishnet nail design, start painting your nails with a polished base coat. Once the base coat is dry, apply a layer of fishnet material over top. Alternatively, you can use a fishnet stencil to create the same effect.
Once you have applied the fishnet material or stencil, paint over top with your desired polish color. Allow the polish to dry completely before removing the fishnet material or stencil. Finally, seal the look with a top coat of clear polish to protect your nails from chipping and keep the design looking fresh for longer.
Whether you are going for a subtle fishnet style or bold and eye-catching nail art, this is an edgy way to add personality to your look!
Acrylic fishnets nails tutorial
Acrylic fishnets nails are a unique and stylish way to add pizzazz to your manicure. They are also relatively easy to do yourself at home with some simple supplies. This tutorial will show you how to create your own acrylic fishnet nails in just a few steps.
What You’ll Need:
- Clear acrylic powder
- Liquid monomer
- Nail brush
- Fishnet stocking
- Scissors
- Nail file
- Buffer
Instructions:
 Begin by mixing a small amount of clear acrylic powder and liquid monomer in a cup or dish. You will want to create a consistency that is not too thick or runny. If the mixture is too thick, add more monomer to thin it out.
- Take your nail brush and dip it into the acrylic mixture. Paint this onto your nails in small strokes, starting at your cuticle area and working outwards towards each corner of your nail. Try to evenly apply the mixture to all of your nails to cover them completely with a thin layer of acrylic.
- Wait for the first layer of acrylic to dry completely before applying another coat on top. Then, repeat until you have achieved a smooth, even surface over all of your nails.
- Cut a piece of fishnet stocking fabric that is large enough to cover one of your nails fully when stretched out flat in front of you. Next, cut out small holes for each of your nails in the fabric using scissors.
- Place the fishnet fabric over your nails and gently press it down to stick to the acrylic surface.
- Using a nail file, buff away any excess fabric around the edges of your nails until you are left with a clean, neat finish.
- Finish off by applying a top coat of clear polish to your nails to seal the design and give them a glossy shine. Enjoy showing off your unique and stylish new manicure!
 Begin by mixing a small amount of clear acrylic powder and liquid monomer in a cup or dish. You will want to create a consistency that is not too thick or runny. If the mixture is too thick, add more monomer to thin it out.